How I Automated My Mushroom Grow Room for Under $200
By LoopString Team
Growing mushrooms is deceptively simple until you realize that fruiting conditions are brutally specific. Oyster mushrooms want 85-95% humidity, 18-24C, and CO2 under 800 ppm. Manually misting and opening a fan three times a day gets old fast.
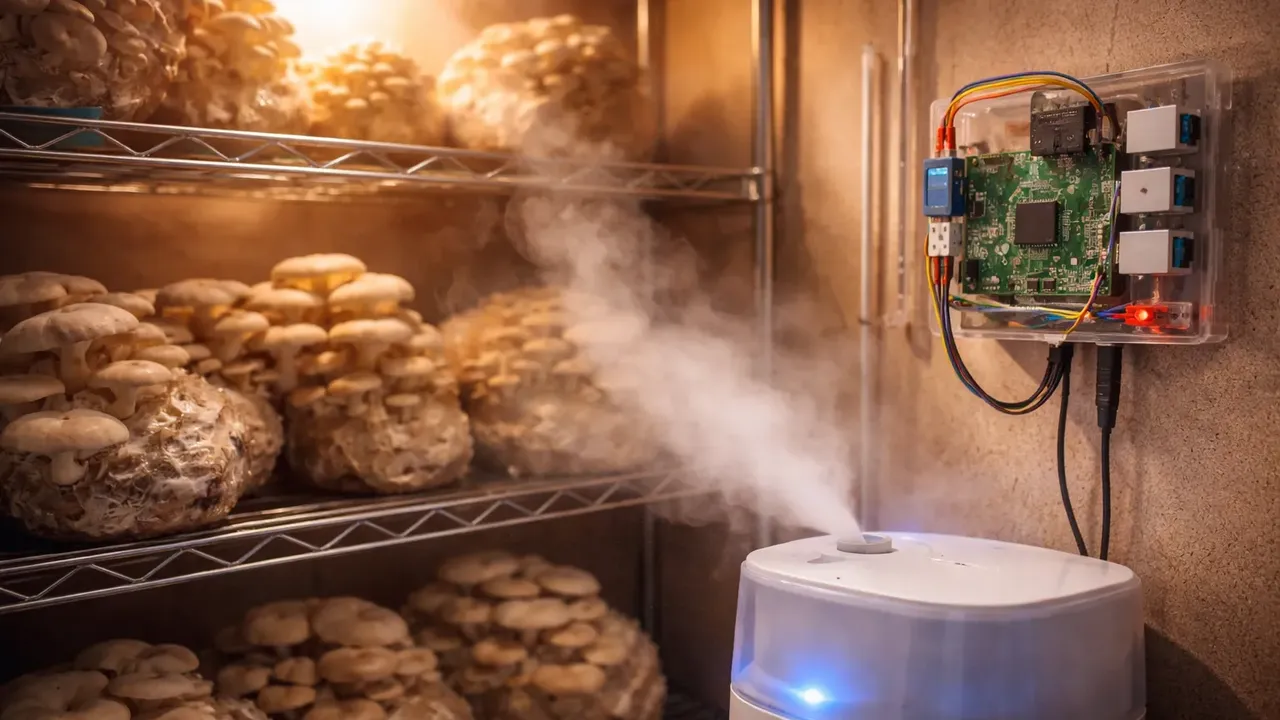
This is the story of how I automated a mushroom fruiting chamber using a Raspberry Pi, a handful of sensors, a humidifier, a fan, and LoopString — for a total hardware cost under $200.
The Setup
Hardware Bill of Materials
- Raspberry Pi 4 — $45 (already owned, but budget included)
- BME280 sensor — $5 (temperature + humidity + pressure)
- MH-Z19B CO2 sensor — $20 (NDIR, accurate to 400-5000 ppm)
- DS18B20 temperature probe — $3 (waterproof, for substrate monitoring)
- 2-channel relay module — $4 (for humidifier and fan)
- Ultrasonic humidifier — $25 (modified with always-on switch)
- 120mm PC fan — $8 (fresh air exchange)
- MicroSD card (32GB) — $8
- Pi power supply — $10
- Wire, connectors, enclosure — $15
- Martha tent (grow tent) — $45
Total: ~$188
The Martha Tent
A "Martha tent" is the mushroom community's name for a clear plastic greenhouse tent used as a fruiting chamber. Mine is a 4-tier wire shelf wrapped in a clear plastic cover, with holes cut for the humidifier inlet and fan exhaust.
Wiring
Sensor Connections
BME280 (I2C):
- VIN to 3.3V, GND to GND
- SDA to GPIO 2, SCL to GPIO 3
- Monitors ambient temperature, humidity, and pressure inside the tent
MH-Z19B (UART):
- VIN to 5V, GND to GND
- TX to GPIO 15 (RX), RX to GPIO 14 (TX)
- Monitors CO2 concentration — critical for knowing when to ventilate
DS18B20 (1-Wire):
- Data to GPIO 4 with 4.7k pull-up resistor
- Inserted into the substrate bag to monitor internal temperature
Actuator Connections
Relay Channel 1 — Humidifier:
- GPIO 17 controls the ultrasonic humidifier
- Humidifier modified with the button taped to "always on" so the relay is the power switch
Relay Channel 2 — Exhaust Fan:
- GPIO 27 controls the 120mm fan
- Fan pulls fresh air through the tent and pushes out CO2-rich air
Software Setup
Step 1: Flash and Claim
I flashed the LoopString OS image to the MicroSD card using Raspberry Pi Imager, booted the Pi, and claimed it with a 6-character token from the LoopString dashboard. Total time: 5 minutes.
Step 2: Configure in the Configurator
I opened the Configurator and created a room called "Fruiting Chamber" with:
- BME280 (ambient temperature, humidity, pressure)
- MH-Z19B (CO2)
- DS18B20 (substrate temperature)
- GPIO Relay x2 (humidifier, exhaust fan)
- Hysteresis controller for humidity
Step 3: Set Up Humidity PID
For humidity control, I chose a hysteresis controller rather than a full PID. Mushroom humidity control is more like a thermostat than a smooth process:
- Setpoint: 90% RH
- On threshold: Humidity drops below 87%
- Off threshold: Humidity rises above 93%
- Dead band: 3% to prevent rapid cycling
When humidity drops, the relay turns on the humidifier. When it reaches 93%, it turns off. Simple, reliable, and the mushrooms do not care about precision above 85%.
Step 4: Set Up Fresh Air Exchange
CO2 management is critical. Mushrooms produce CO2 as they grow, and concentrations above 1000 ppm cause long, thin stems and small caps.
I set up a scheduled automation rule:
- Fan runs for 5 minutes every 30 minutes
- Additional trigger: if CO2 exceeds 800 ppm, fan turns on regardless of schedule
- Fan off when CO2 drops below 600 ppm
This gives the mushrooms regular fresh air while keeping humidity loss to a minimum.
Step 5: Deploy
One click. The Configurator generated the Node-RED flow, sent it to the Pi, and within 10 seconds I had live data streaming to my dashboard.
Results
The Dashboard
My mushroom dashboard shows:
- Ambient temperature — Holding steady at 21C (room temperature)
- Substrate temperature — 22C (slightly warmer from mycelium activity)
- Humidity — Cycling between 87-93% with the hysteresis controller
- CO2 — Peaks at 700 ppm between fan cycles, drops to 450 during ventilation
- Humidifier status — Toggle showing on/off state with duty cycle tracking
- Fan status — Shows scheduled and triggered run times
What I Learned
Humidity is the hardest variable. The humidifier fog cools the air, which temporarily raises relative humidity readings. I added a 30-second settling delay after the humidifier turns off before reading humidity again.
CO2 sensors need warm-up time. The MH-Z19B takes 3 minutes to stabilize after power-on. LoopString's Node-RED template handles this automatically by discarding early readings.
Alarm thresholds are essential. I set a critical alert at 30% humidity (humidifier ran out of water) and got an email notification at 2 AM. Refilled the reservoir and saved a flush of oyster mushrooms.
Cost Comparison
Commercial mushroom automation controllers start at $300-500 and usually only handle humidity. My $188 setup handles:
- Temperature monitoring (ambient + substrate)
- Humidity control with hysteresis
- CO2 monitoring with automated ventilation
- Scheduled fresh air exchange
- Cloud dashboard accessible from anywhere
- Alert notifications via email
- Historical data and analytics
Scaling Up
I started on the free tier (1 device, 8 sensor slots). My fruiting chamber uses 7 slots (3 from BME280, 1 CO2, 1 substrate temp, 2 actuators). When I added a second tent for shiitake, I upgraded to the Starter tier ($7/month) for a second Pi and 16 sensor slots.
The LoopString pricing scales naturally with your grow operation:
- Free — 1 tent, basic monitoring
- Starter — 2 tents with full automation
- Maker — 5 tents for a small commercial operation
Try It Yourself
Create a free LoopString account and use the Mushroom Fruiting Chamber project template in the Configurator. It pre-configures the rooms, sensors, actuators, and control logic described in this article. All you need to do is wire the hardware and deploy.
Learn More
- Environmental Sensors — humidity, CO₂, and temperature sensors for grow rooms
- Hysteresis Controllers — on/off control for fans and humidifiers
- Using Templates — start with pre-built grow room configurations
- PID Temperature Control with Raspberry Pi — precise temperature control