See LoopString in Action
Four screens of the live product, six vertical use cases, and one fast path from sign-up to first automation.
Free tier available — no credit card required
Product tour
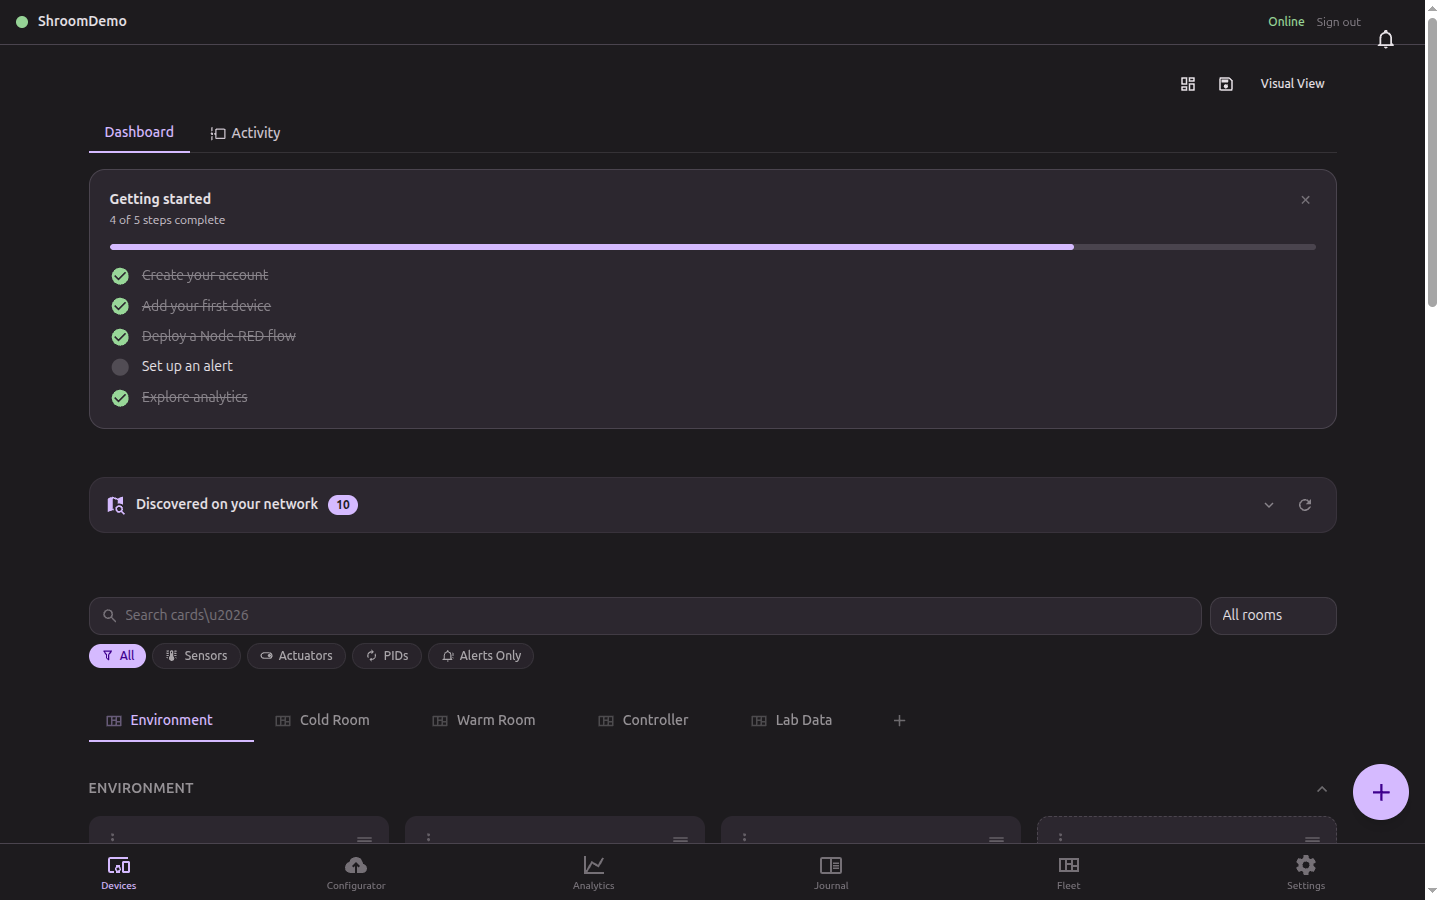
Live dashboard
Every sensor, actuator, and controller on one pane. Room-based organization, live sparklines, instant status.
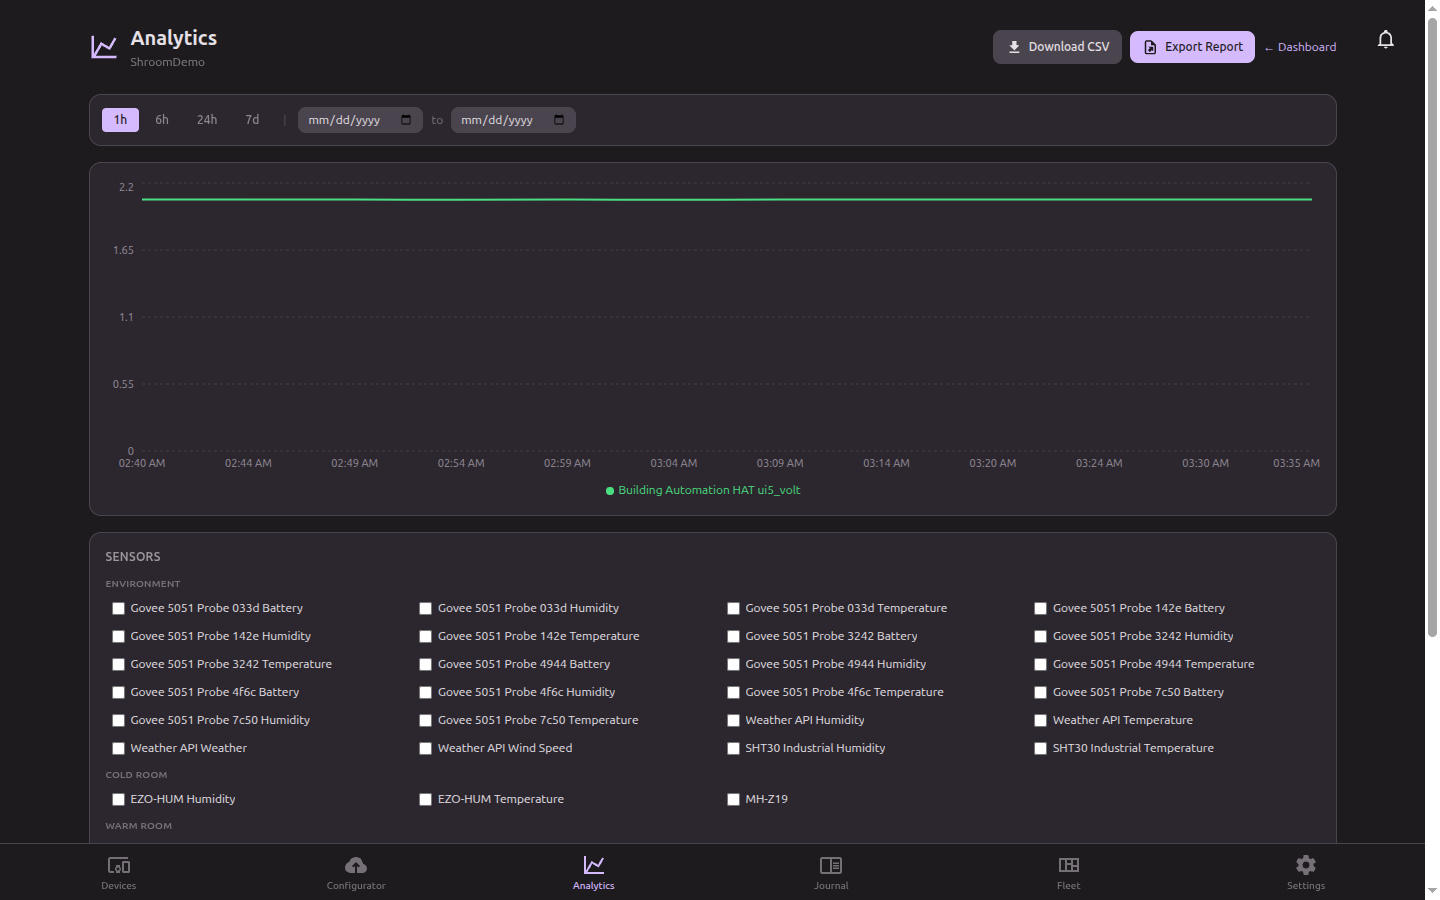
Analytics & history
Multi-signal charts with configurable time ranges and CSV export. Find the temperature drift before the next batch.
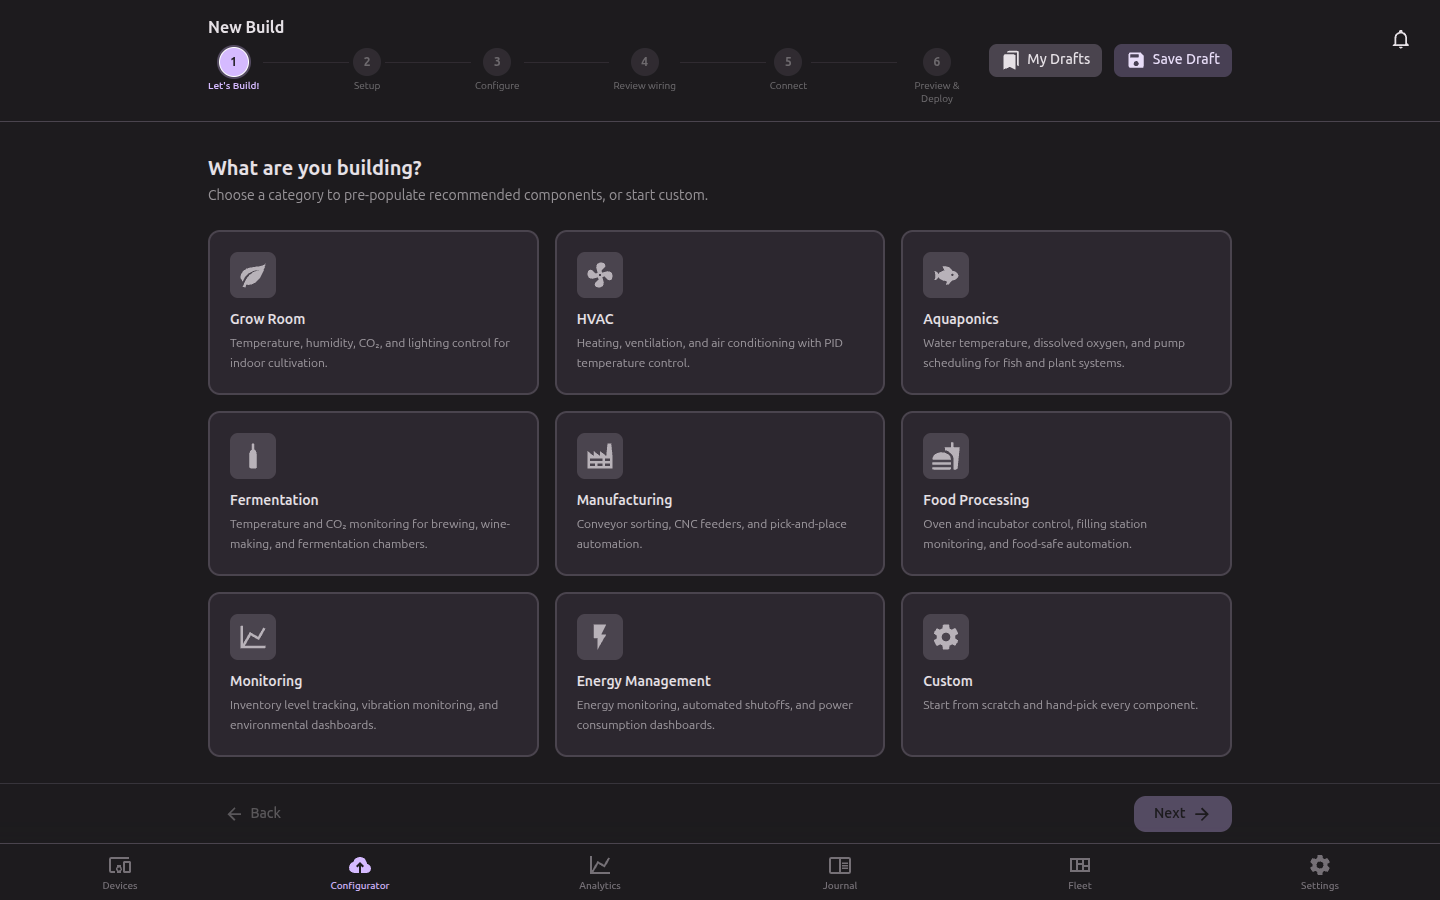
Visual Configurator
Drag-and-drop sensors, PID controllers, and actuators into a flow. Deploy generated Node-RED to the Pi in one click.
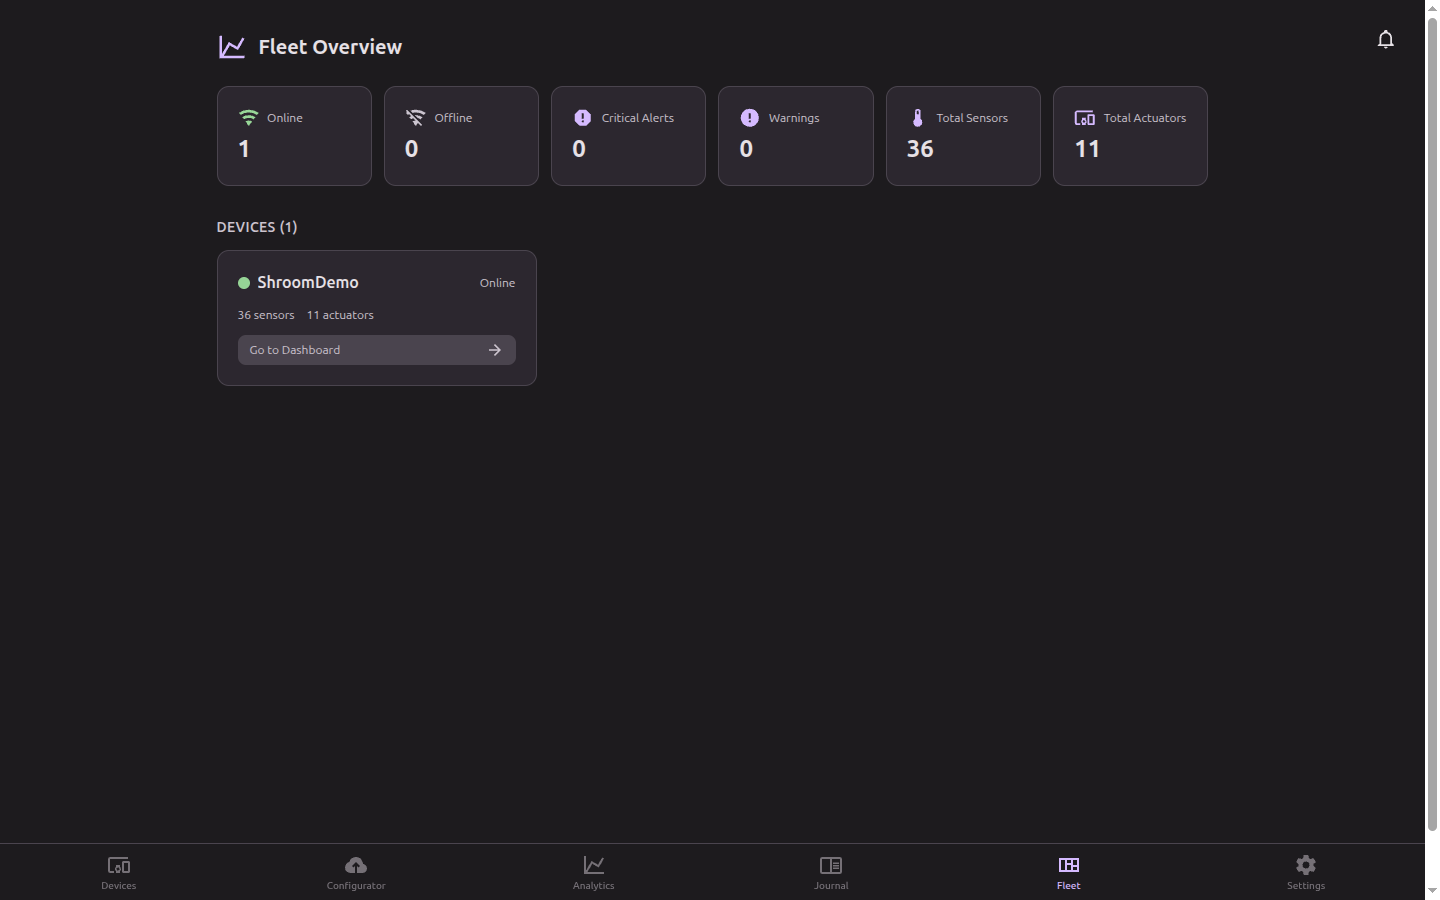
Fleet management
Multi-Pi grouping, deployment history, online status, and per-device health. Scale from one room to a chain.
Video walkthrough recording soon — subscribe on YouTube to be notified.
How the platform works
Connect & Onboard a Pi
Scan the QR code in the app to register a Raspberry Pi. Your device appears on the dashboard within seconds — no SSH, no manual config.
Build Automation Flows
Drag sensors, actuators, and PID controllers into the Configurator. Wire them together visually and deploy to the Pi with one click.
Monitor Live & Historical Data
Watch real-time sensor telemetry update on the dashboard. Dive into analytics for trend analysis and capacity planning.
Set Alerts & Automations
Configure threshold alerts that fire SMS or in-app notifications. Add time-based schedules and conditional logic rules to your automation.
Pick the use case closest to yours
Each page walks through the sensors, automation, and reporting the platform ships for that vertical.
Mushroom fruiting chambers
Recipe-driven humidity + CO₂ profiles for shiitake, lion's mane, oyster, and reishi flushes.
See the walkthrough →Craft & nano brewing
Fermentation tank temperature, mash schedule automation, batch logs, and recipe runner.
See the walkthrough →Commercial grow rooms
Multi-room PID climate, lighting schedules, irrigation pulses, compliance PDF audit trails.
See the walkthrough →Greenhouses
Vent + heater + irrigation coordination from a single Pi — survives any ISP outage.
See the walkthrough →Hydroponics
EC + pH dosing automation, reservoir level monitoring, room-by-room nutrient tracking.
See the walkthrough →HVAC
Multi-zone setpoint sync, fleet alarms, duty-cycle tracking, room-by-room climate dashboards.
See the walkthrough →Cold storage
Walk-in, freezer, and blast-chiller monitoring with HACCP / FDA / USDA-grade temperature audit trails.
See the walkthrough →Ready to build your first automation?
Start on the Free tier and upgrade as you grow.
No credit card required